


19th Sep 2024
How to Build a Multi-Functional Sewing Room
How to Build a Multi-Functional Sewing Room
Every sewing enthusiast needs a space where their creativity can flow. An organized sewing room can help provide the perfect environment where your designs and ideas can come to life. If you are not sure where to start your project, we’ve put together a list of how to build your own multi-functional sewing room.
Here are some standard steps and tips for building the sewing room of your dreams that is both functional and fun. These steps include:
- Designing your sewing room floor plan
- Assessing sewing equipment and cutting tables
- Storage space planning ideas
- Lighting your workspace
- Choosing décor
READY. SET. SEW!
Designing Your Sewing Room Floor Plan
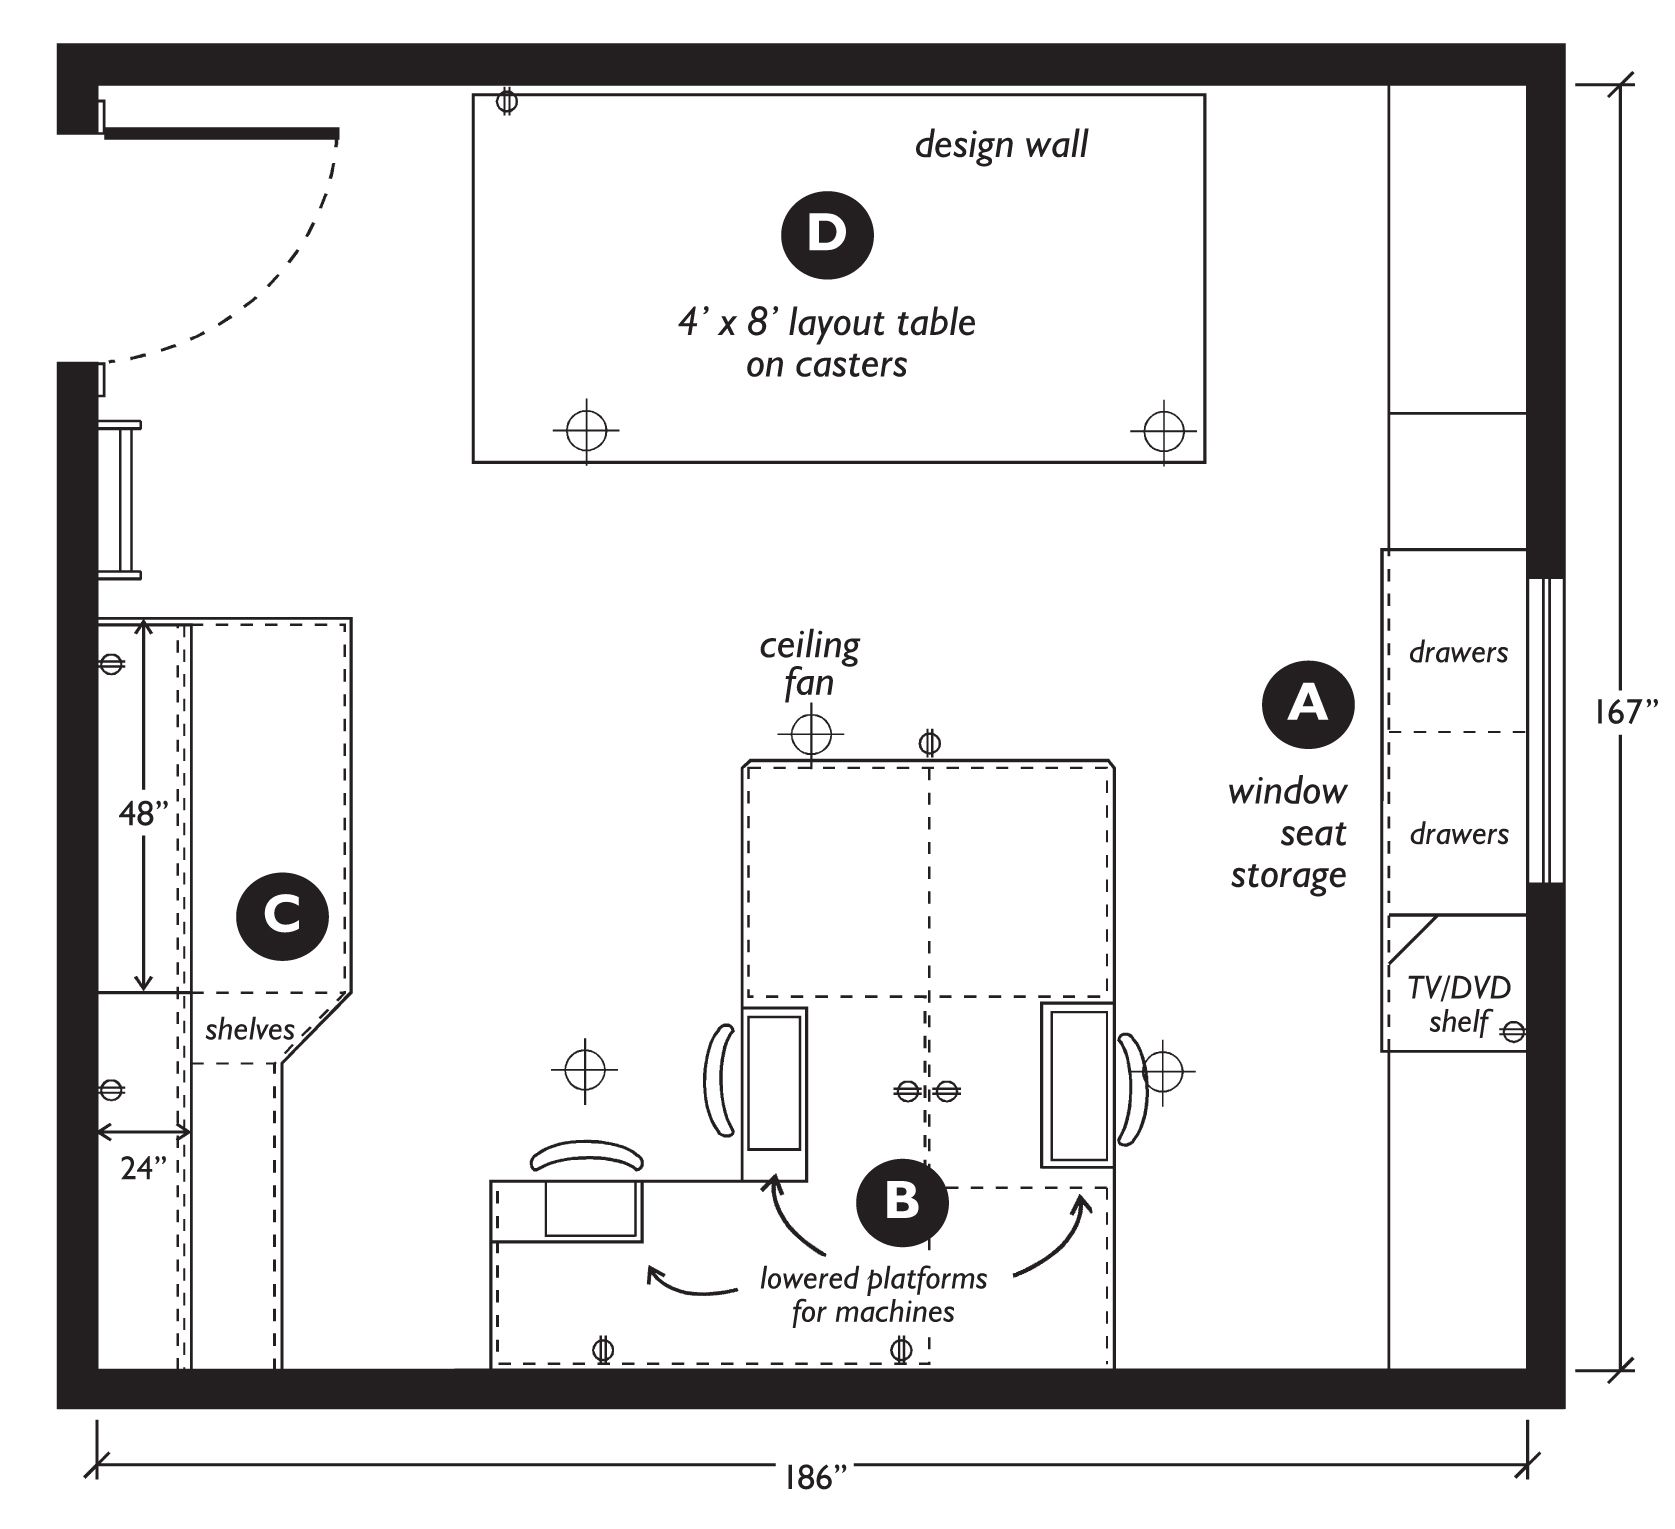
First, you will want to assess the size of the sewing space that you will be working in. And don’t be discouraged if you have just a tiny nook or a small sliver of a study. No matter the size of your space, proper planning can transform it into enough room for a sewing hobby.
You will need to assess the size of your room by square feet. The simplest way to get started is by using a 25-foot measuring tape. Most square or rectangular rooms are under 25 feet in length and width. Once you have your measurements, you can work on planning how you will best use your space.
You will also want to design the layout of where your equipment and worktables should be placed. There are many online tools to help you figure out your room dimensions before you design your floor plan.
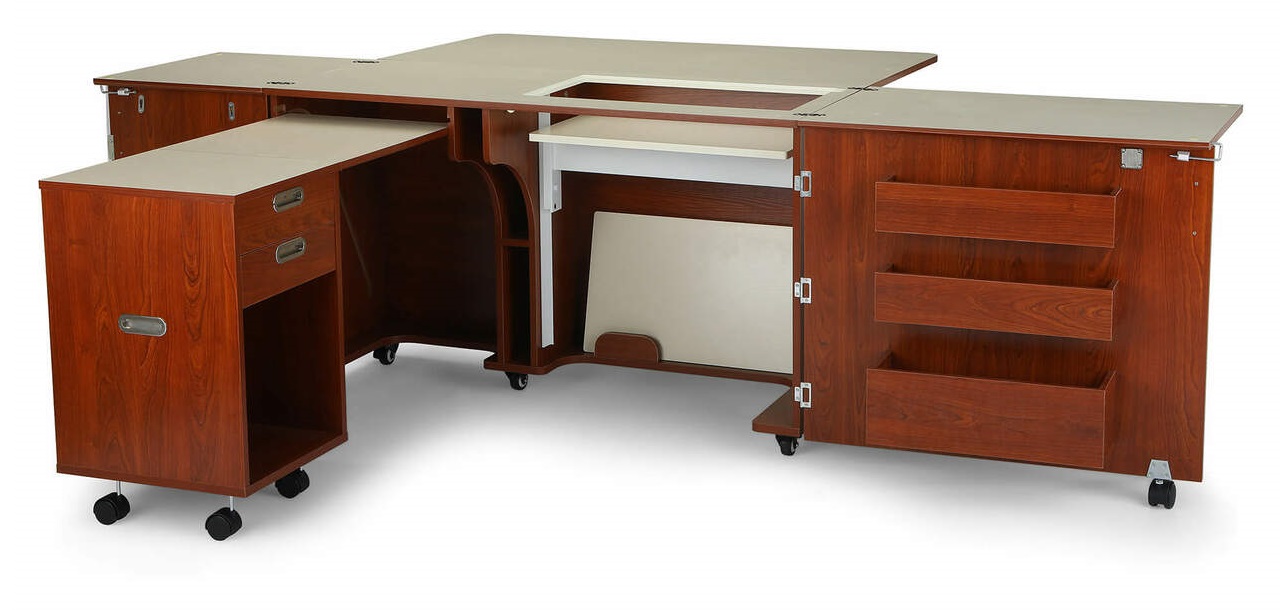
Assessing Sewing Equipment and Cutting Tables

Sewing machines can vary in size based on their
function. For instance, a
quilting sewing machine t
Using the same measuring tape, take measurements of the size of your sewing equipment (length and width). Ideally, you will want to plan a pathway of a minimum of 36 inches between your equipment. Also be sure to keep at least a one-foot distance away from the wall for the fabric you will be sewing.
Additionally, space for your ironing boards and a separate
cutting table should be considered. If you plan on having a
cutting table,
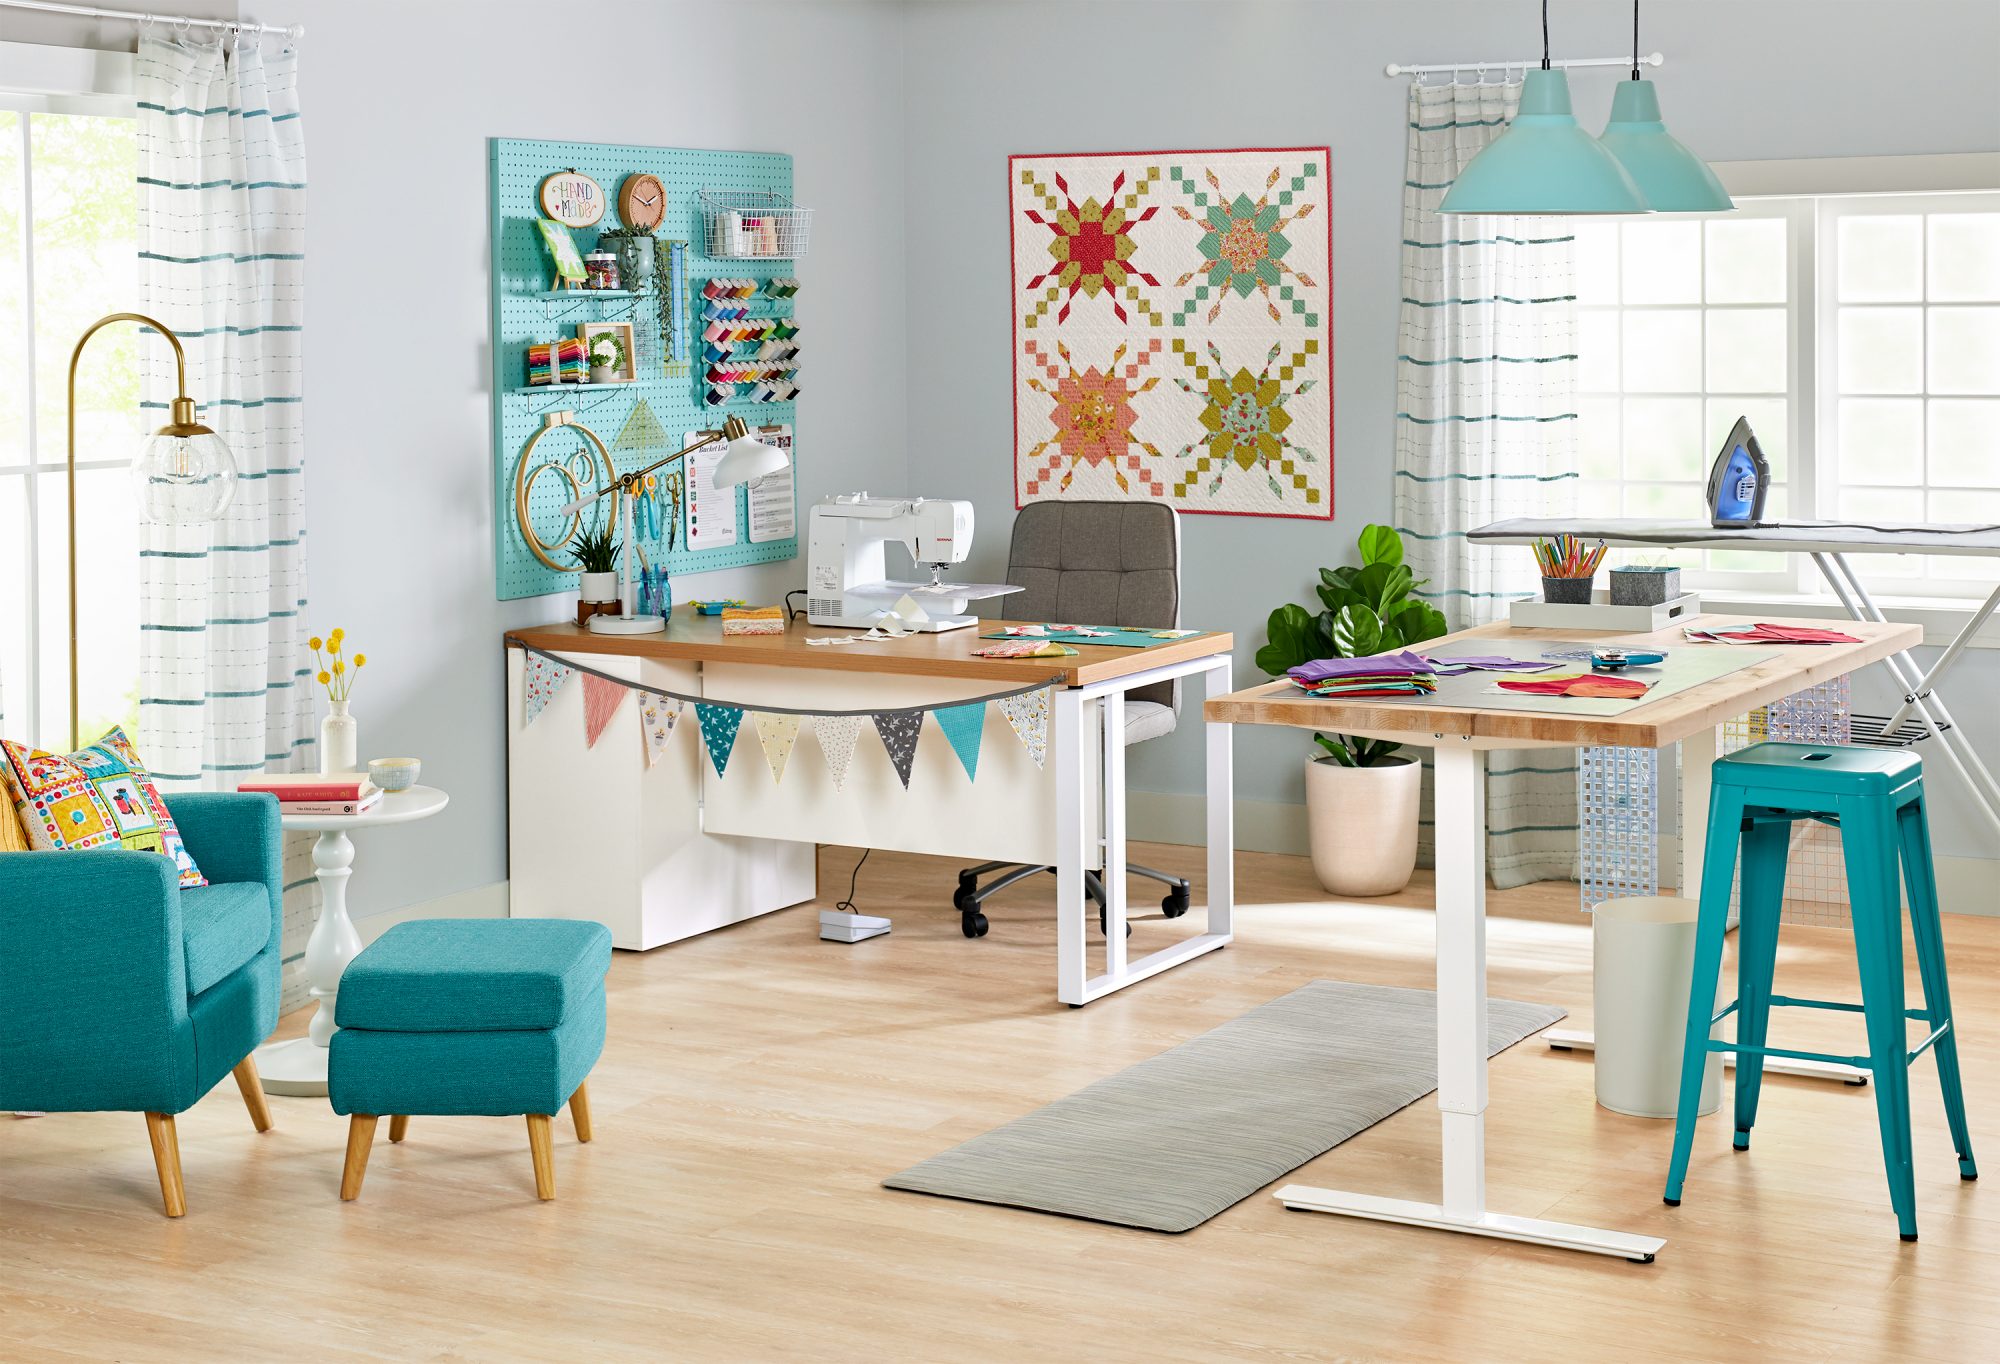
Storage Space Planning Ideas
Keeping fabric, patterns, steamers, pressing aids, thread and needles within reach is easily solved with a little ingenuity. Typically, there are two types of storage options. One option is a custom-built unit that rolls under your table for storage. The other option is a free-standing storage unit.
If you are working on a budget or would rather spend more money on a sewing machine than storage, you need an affordable storage solution. You can find many options on Pinterest, but cubed storage shelf systems are the most practical and are available at most big-box retailers. In fact, open storage shelves with a view of fabrics and materials are often the best way to organize sewing fabrics.
Thimbles, scissors, and other loose sewing accessories should be stored enclosed. Use drawers with compartments or dividers separating your tools. Many sewing machines even come with built-in storage drawers for these items, which can keep them handy.
Lighting Your Workspace
Many of today’s domestic sewing machines come with built-in lighting as a standard feature. However, ceiling lighting or overhead lighting should also be considered, especially when illuminating cutting tables and ironing boards. Ideally, overhead lighting (such as track lighting) should be adjustable so that you don’t cast shadows on sewing projects or fabrics.
Choosing Décor
This might be the best part of designing a multi-functional sewing room! Maybe you have considered paint colors for the walls or already have a design picked out. If you are stumped for décor ideas, why not use your current sewing projects or future designs as the centerpiece of your décor? You might find your inspiration in a favorite painting or antique. Or better yet, if you have windows in that room, sew the curtains yourself. The more you invest in your own creative space, the more it will inspire you.
With all these tips, it should be easy to get started on a new multi-functional sewing room or to start a new one from scratch!